Print photos using a proof sheet
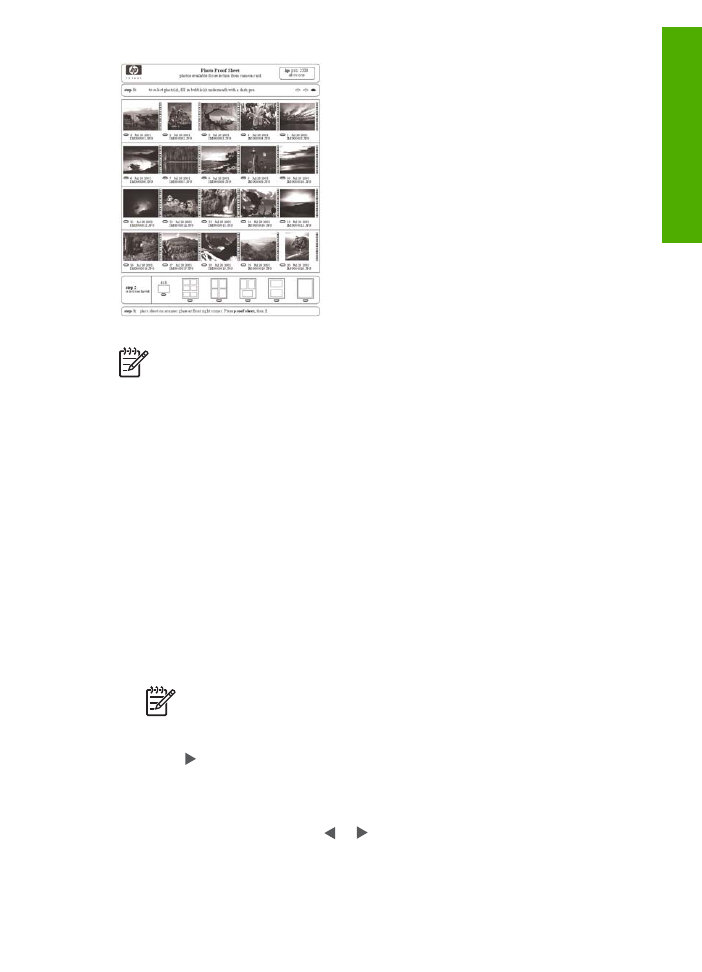
A proof sheet is a simple and convenient way to select photos and make prints
directly from a memory card or storage device without the need for a computer. A
proof sheet, which might be several pages long, shows thumbnail views of photos
stored on the memory card. The file name, index number, and date appear under
each thumbnail. Proof sheets are also a quick way to create a printed catalog of your
photos.
Chapter 9
88
HP Officejet 6300 All-in-One series
Photos
and
videos

Note 1
You cannot print a proof sheet of photos on a camera in PictBridge
mode. The camera must be in storage mode.
Note 2
From the control panel on the HP All-in-One, you can only access the
following types of image files: JPEG, TIFF, MPEG-1, AVI, and Quicktime. To
print other types of files, transfer the files from your memory card or storage
device to your computer and use the HP Photosmart Software.
In order to print photos from a proof sheet you must complete the following tasks,
explained in detail in the procedures below.
●
Print a proof sheet of the images on your memory card or storage device
●
Complete the proof sheet
●
Scan the proof sheet
To print a proof sheet
1.
Insert a memory card into the appropriate slot on the HP All-in-One, or connect a
storage device to the front USB port.
2.
In the Photo area, press
Proof Sheet
, and then press
OK
.
This selects the
Proof Sheet Menu
and then selects
Print Proof Sheet
.
Note
Depending on how many photos are on the memory card, the time
it takes to print a proof sheet can vary greatly.
3.
If there are more than 20 photos on the card, the
Select Photos
menu appears.
Press to select one of the following:
–
All
–
Custom
If you select a video, only the first frame of the video will print on the proof sheet.
4.
If you choose
Custom
, press or until the photo number for the first photo
appears, then press
OK
.
User Guide
89
Photos
and
videos

Note
You can erase photo numbers by pressing to backspace.
5.
Press or until the photo number for the last photo appears, then press
OK
.
6.
Complete the proof sheet.
To complete a proof sheet
1.
Select the photos to print by using a dark pen or pencil to fill in the circles located
under the thumbnail images on the proof sheet.
Note
If you select a video on the proof sheet, only the first frame of the
video will be printed.
2.
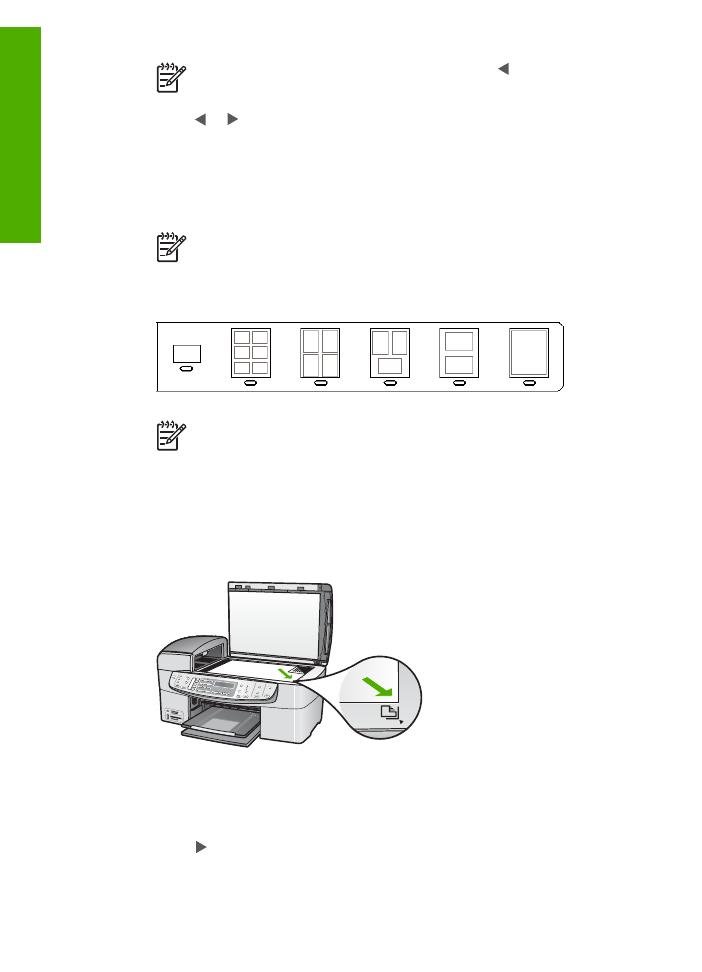
Select one layout style by filling in a circle in step 2 of the proof sheet.
Note
If you need more control over print settings than the proof sheet
provides, you can print photos directly from the control panel.
3.
Scan the proof sheet.
To scan a completed proof sheet
1.
Load the proof sheet print side down on the right front corner of the glass. Make
sure the sides of the proof sheet touch the right and front edges. Close the lid.
2.
Load photo paper in the input tray. Make sure the same memory card or storage
device you used to print the proof sheet is still inserted or connected to the HP All-
in-One when you scan that proof sheet.
3.
In the Photo area, press
Proof Sheet
.
The
Proof Sheet Menu
appears.
4.
Press until
Scan Proof Sheet
appears, then press
OK
.
The HP All-in-One scans the proof sheet and prints the selected photos.
Chapter 9
90
HP Officejet 6300 All-in-One series
Photos
and
videos

10